To ensure that Dexterity-based applications store and retrieve SQL data properly, you must configure your ODBC data sources as described in the following procedure.
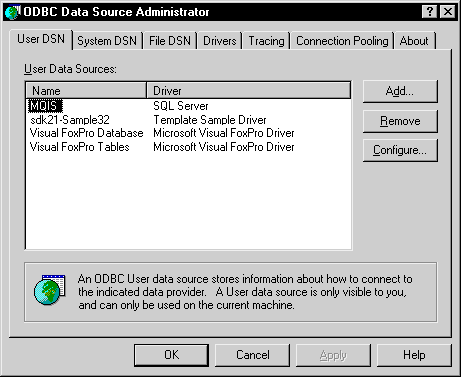
Launch the ODBC Administrator by double-clicking the ODBC icon in the Windows Control Panel. This will launch the ODBC Administrator application, and a Data Sources window similar to the one shown in the following illustration will appear.
![]()
Click Add to add a new data source.
A Create new Data Source window will appear.
![]()
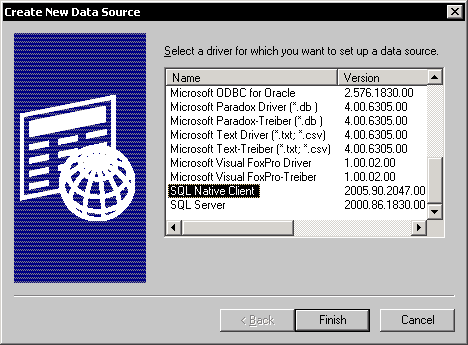
In this window, select the driver you want to use. For SQL Server 2005 or later, select SQL Native Client. Click Finish.
The next several windows are part of a wizard that will help you set up the ODBC data source. The first window for the wizard is shown in the following illustration.
![]()

Supply the name and description for the data source. Also specify the name of the server you want to connect to, then click Next to continue.
Be sure to select the option indicating you will use SQL Server authentication.
![]()

We don’t recommend marking the option to connect to the SQL Server, because of security considerations.
Click the Client Configuration button to specify the network library you want to use to communicate with the SQL Server.
![]()
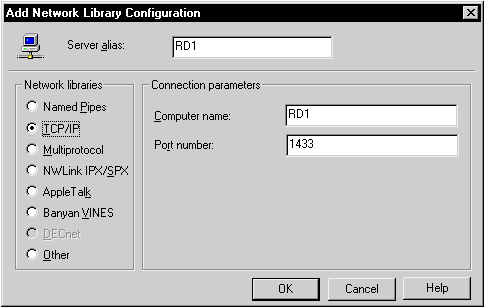
For optimal performance, we recommend choosing TCP/IP. Click OK when you have made your selection, and then click Next to continue.
Next, specify the options for the database. Be sure that all of these options are unmarked.
![]()

Click Next to continue.
![]()
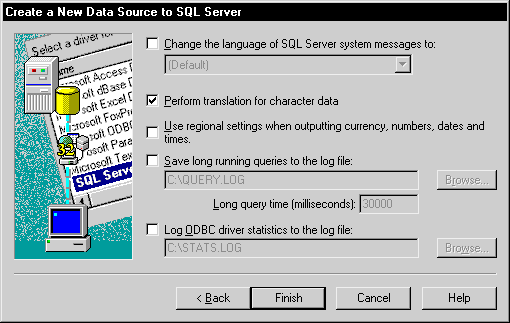
Specify additional options for the database. Be sure the Perform translation for character data option is marked. Click Finish to create the data source.